Selenium Installation
We all know that Selenium Webdriver is an Automation testing tool, But do you know In what the Tool is available, Let’s discuss that in the context of Java flavor. (Because Selenium web driver can be used with different languages such as Java, Python, C#, Perl, Ruby, etc).
For creating Java Project you would be needing an IDE (Integrated Development Environment)
Eclipse IDE
We might need Java to be installed which can be used by IDE to create java Project.
Java
Once above are installed we can make use of available Selenium Jars to create the first Selenium WebDriver Test.
Let’s start with the Installation,
Java Installation
Step1:
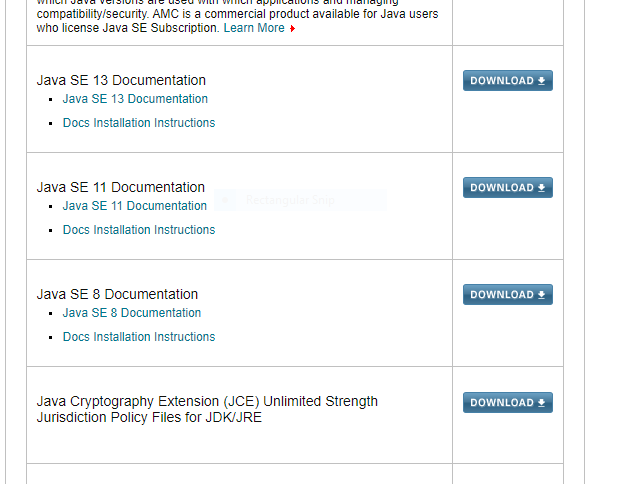
Launch the below URL:
https://www.oracle.com/technetwork/java/javase/downloads/index.html
To Download Java. Java 8 is advisable to proceed with Java Installation.
Step 2:
Once Downloaded please follow the below steps,
Step 3:
Click the downloaded file to start the installation,
Step 4:
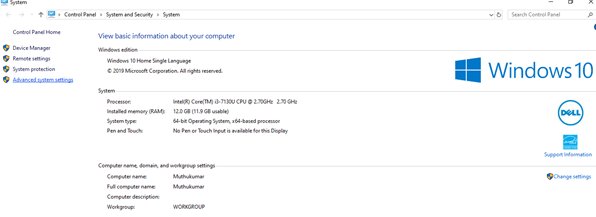
Once the file is installed launch the below System Properties Screen,
Step 5:
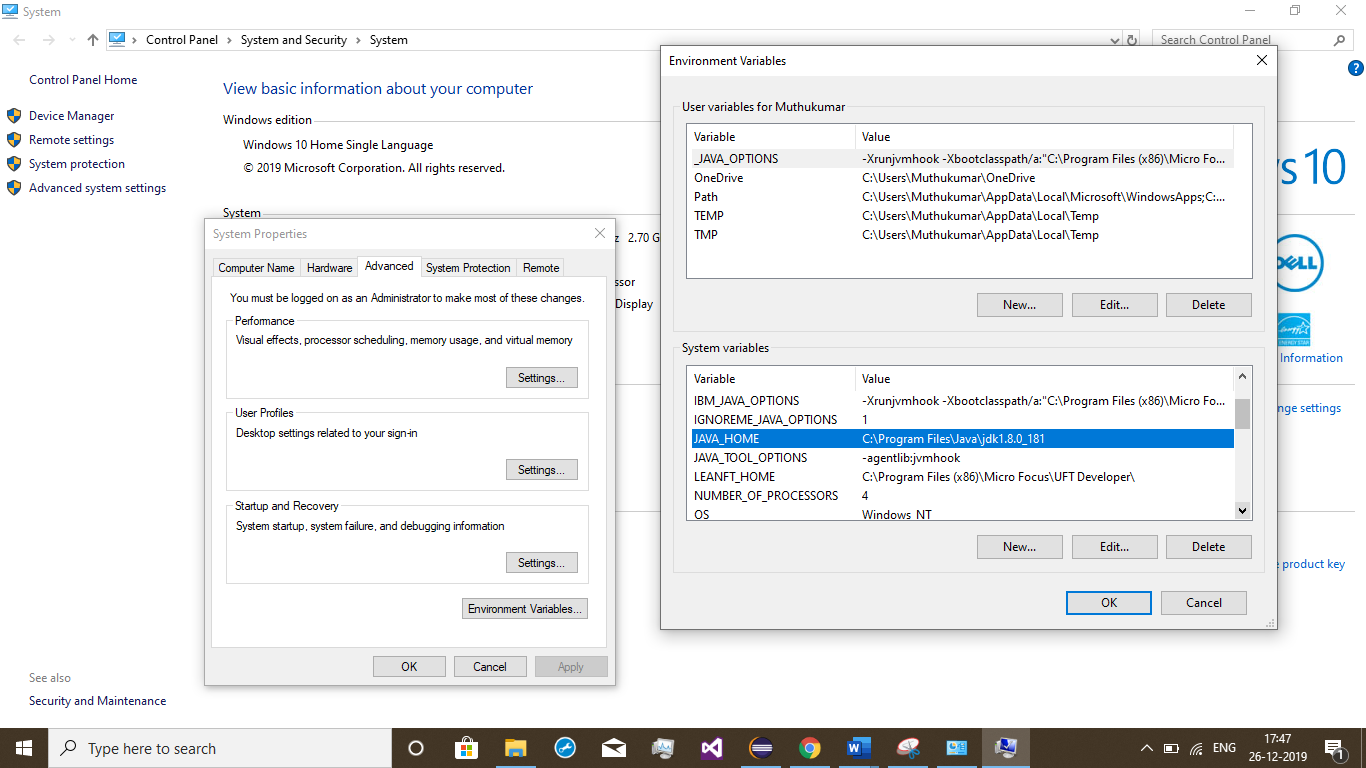
Click on the Advanced System Settings, And then add the Environment variable “JAVA_HOME” and add the path of the JDK File, that presents in your system.
For e.g.: C:\Program Files\Java\jdk1.8.0_181
Step 6:
Once the above step is done, you can verify the java installation in Command Prompt.
C:\java -version
This would confirm our java installation. Now, you can start with Eclipse Installation
Eclipse Installation
Step 1:
Launch the URL “https://www.eclipse.org/downloads/packages/release/2019-09/r” and select the below highlighted Eclipse flavor to download.
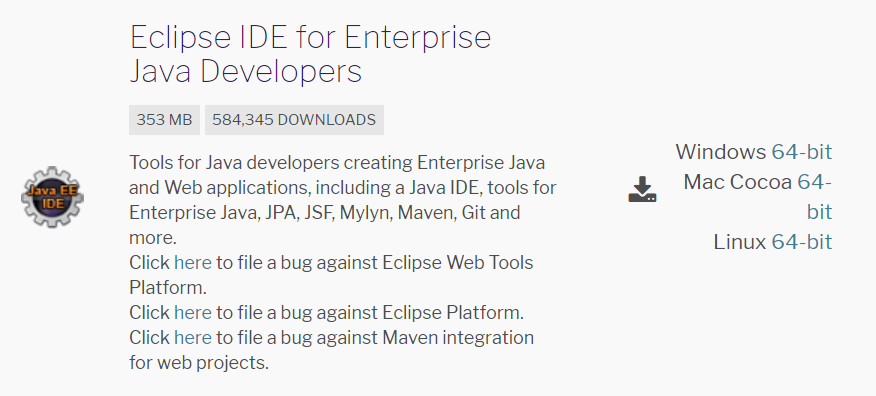
Step 2:
Extract the downloaded file and install the .exe file to complete the installation. Once downloaded you can launch the Eclipse IDE.
Step 3:
Create a Java Project.
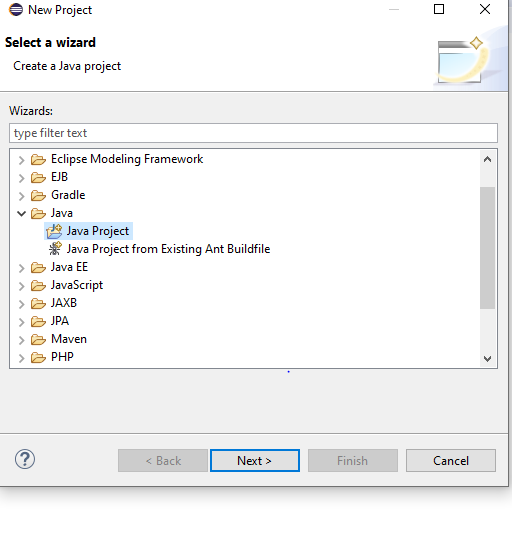
Step 4:
And after clicking Next,
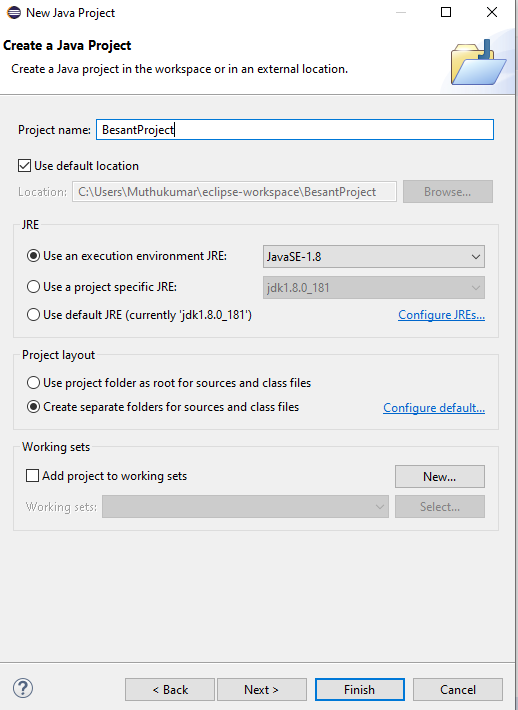
Step 5:
And click on Finish to create a Java Project.
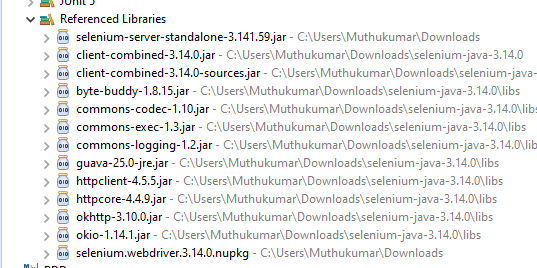
Step 6:
You would need above List of Jars to be Referenced to your Project along with Browser Driver to Start with Selenium WebDriver, below are the links using which we can download the Jars. http://www.seleniumhq.org/
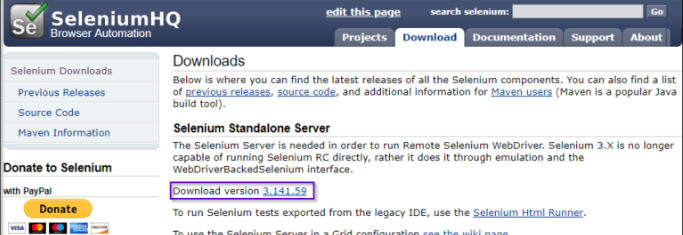
Step 7:
Then you should scroll down the page to download selenium Java client,
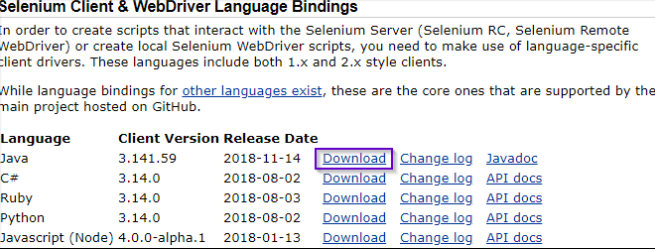
Step 8:
At least you have to download Chrome Driver for Google chrome or Gecko Driver for Mozilla Firefox or IEDriver for Internet Explorer. Once these are downloaded we can good to start our selenium Test Automation.

