
Create a Selenium Maven Project With Eclipse
Introduction
Integrating the Maven project with Selenium provides a complete lifecycle for a test project using Eclipse. Apache Maven is project management software that can extensively manage a project’s development, project build, documentation, reporting, and testing just through the information gathered from the chief project details. It is very easy to build and manage any Java-based projects through Maven.
In this blog, you will learn to create the Selenium Maven project with the help of TestNG with Eclipse through a few quick instructions through images. This process will hardly require 5 or a maximum of 10 minutes of time.
You may be already using TestNG and Webdriver with Eclipse. However, if you aren’t, then firstly, check if you have installed a TestNG plugin in Eclipse. For this, you must go to Window >> Preferences then look for TestNG. If your Eclipse has TestNG and Webdriver, it will be displayed in the windowpane.
Also, ensure that Maven Integration in your Eclipse is enabled. This can be done easily, just open the window Eclipse marketplace, and look for maven keyword. You will get some search results where you must check for Maven Integration for Eclipse. Once you see this search result click on install Maven support if it’s not previously integrated. Now, you have completed the pre-requisites required for the Selenium Maven project.
How to Construct a Selenium Maven Project in Eclipse
In order to execute the Maven project, you must follow the steps below. The images followed by the steps will help through the process while practical execution.
- Open Eclipse
- Click on the right-click button on Package Explorer
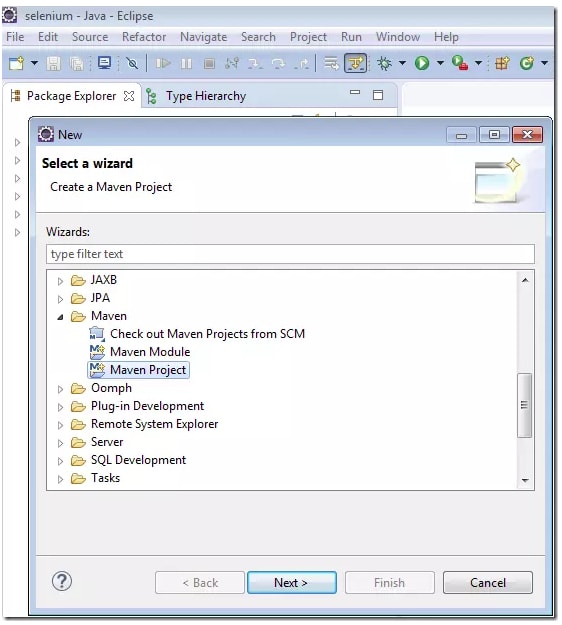
- Choose New and go for Maven project
- Click on Next button
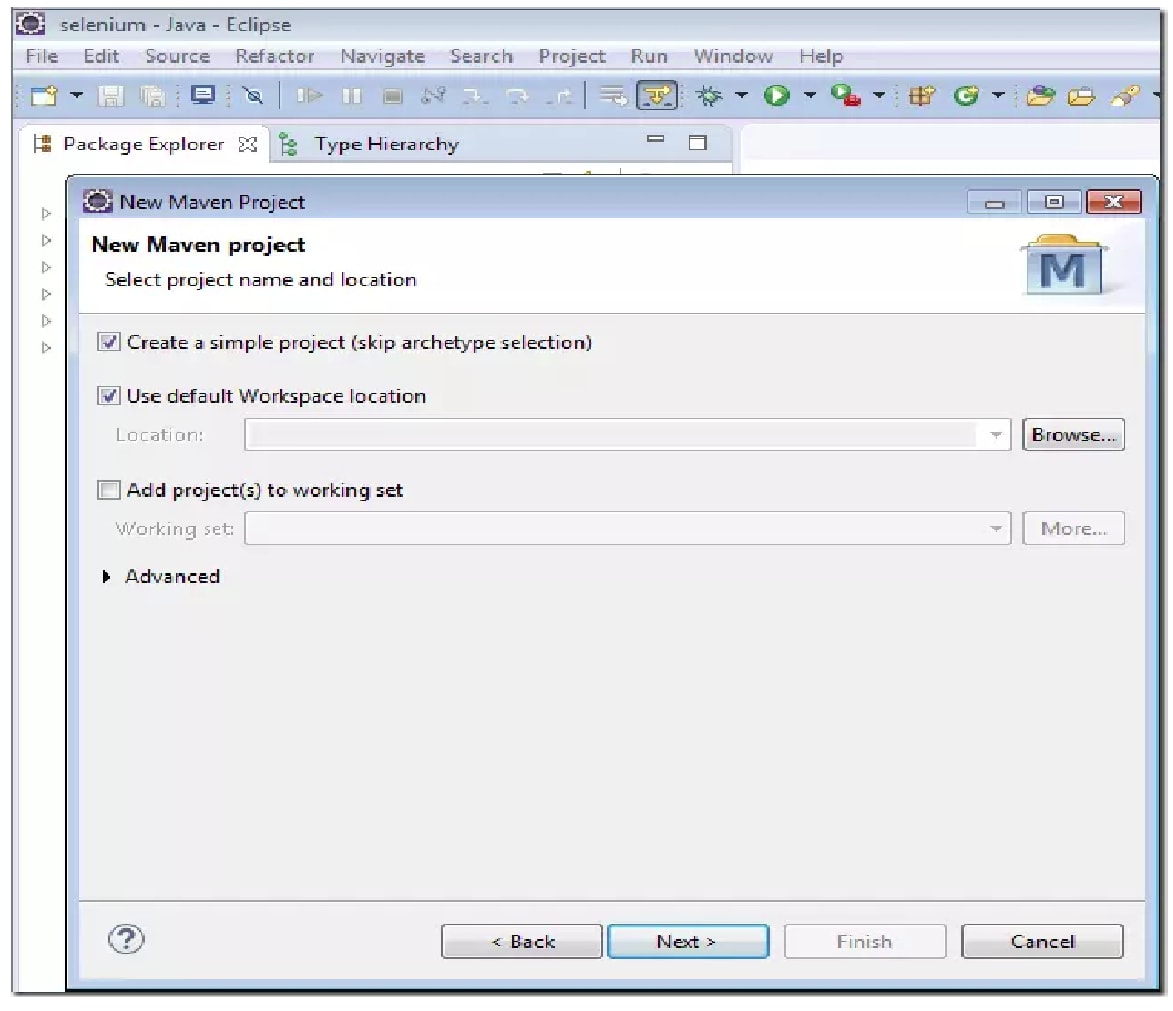
- Click on <Create a Simple Project (skip archetype selection)>
- Also, click on <Use default Workplace location>
- Click <Next>
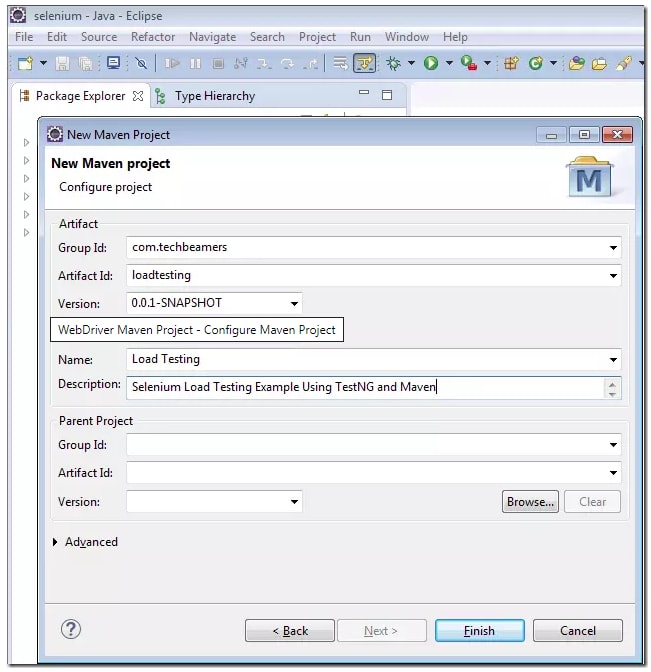
Fill the required items:
- Group ID
- Artifact ID
- Name
Click on a finish to complete the process of creating a project
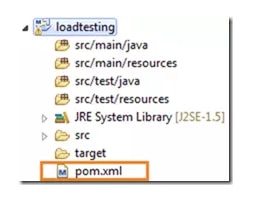
The below image shows how the project structure would look like:
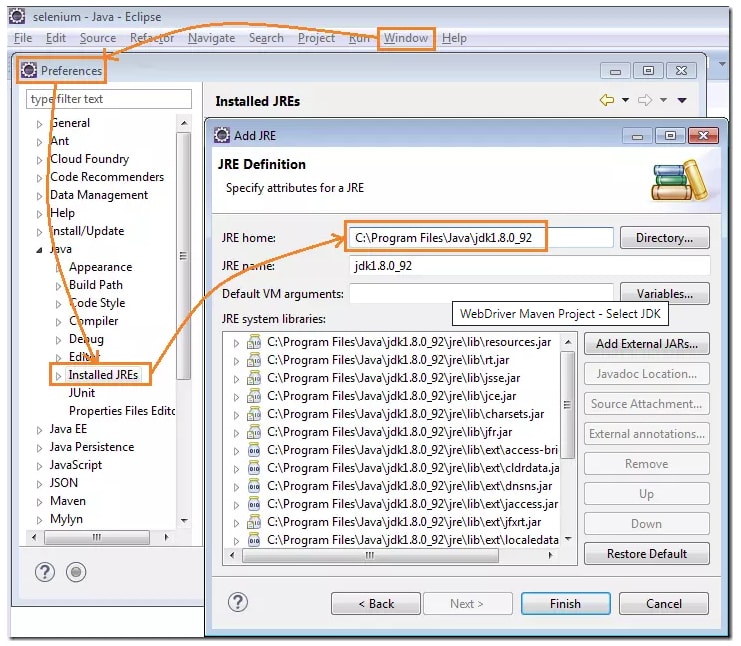
Now, you should ensure that the JRE you have installed is appropriately towards the JDK path in your system. You can change this from Preferences as shown in the below image:
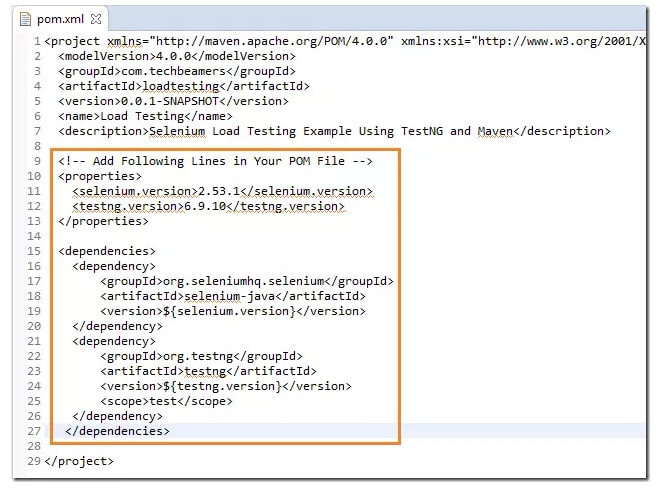
In Maven projects, you must use the POM file in order to add the needed dependencies. You should also add some more libs to the Webdriver Maven project. They are known as TestNG and Selenium JAR files.
Related Blogs
- What is Selenium?
- Selenium Career Opportunities
- RPA Vs Selenium
- Importance of Selenium with Software Testing
- Why Selenium is So Famous Recent Days?

