Amazon Web Services CloudFront
CloudFront derived as Content Delivery Network helps in retrieving the information from the Amazon S3 bucket and then allocate it to various locations in the data center. It distributes the information through the data center networks named edge locations.
The adjacent edge location is connected when there is a request for data from the users. It leads to low network traffic, lowest latency, and faster access to the information, and more. In this tutorial, we will check about the Content Delivery Network of Amazon web services in depth.
How Amazon Web Services CloudFront distribute the content?
Amazon Web Services CloudFront distributes the content through the following steps.
- The users will access the websites and then provide a request for an object to download those object like an image file.
- DNS connects the request of the user to the adjacent edge location of the CloudFront to apply the user request.
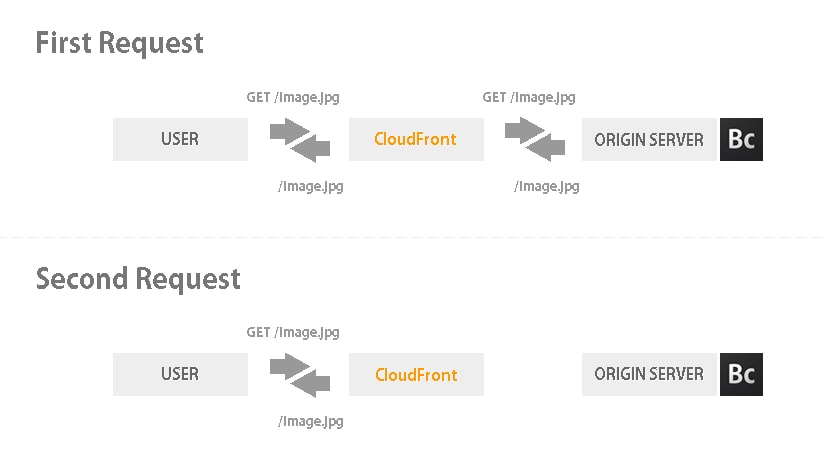
- The CloudFront check their cache, whether there are any requested files at the edge locations. If any of the requests is identified, it returns those request to the users. In case there are no requests, then it does the following aspects.
- At first, the CloudFront examines the user requests with the specifications and then transfer it to the particular origin server for the relative file type.
- The origin server, now send those files back to the edge location of the CloudFront.
- Once the first byte has arrived from the origin, the CloudFront starts transferring to the users and then adds those files to the edge location cache so that when next time there is a user request for the particular records, it can be directly transferred from the CloudFront without any hassles.
- You can find those file objects present in the cache of the edge location until the duration provided in the file headers or else it stays for 24 hours in the edge cache. The CloudFront process the following aspects when the object is in the edge location cache.
- CloudFront transfers the object’s next request to the origin of the users to check whether the version of the edge location is updated or not.
- In case it identifies an update of the edge location version, then the CloudFront transfer it to the users.
- In case, there is no update on the edge location version, and then the origin sends the updated latest version to the CloudFront. Once it’s updated, the same step is repeated. Once the object is delivered to the user, the newest version is stored in the edge location.
What are the features available in CloudFront?
There are many unique features present in the Amazon Web Services CloudFront. Let’s check them below.
- User-friendly: The CloudFront is developed to be simple and easy to use.
- Affordable: With the help of Amazon Web Services CloudFront, only the payment for the delivered content is paid. There are no up-front fees or hidden charges present for the Amazon CloudFront services.
- Reliable: Amazon CloudFront is developed on the highly trustworthy infrastructure of the Amazon. It means the edge locations are capable of diverting the end-users to the next adjacent locations automatically in case of some situations.
- Rapid: The content copies that are near to the end-users are cached by the CloudFront and edge locations broad network, and therefore this leads to high data transfer rates, lower latencies, and more moderate network traffic. All these processes in CloudFront are made in a faster way.
- Capable of suing with other AWS services: The CloudFront of AWS is developed in a way that they can be used with other Amazon web services like Amazon EC2, Amazon S3, and more.
- Flexible: Maintenance is a no worry when you work with the Amazon Cloud Front web services as the service responds to the users automatically in case of any action required. The same happens when there is an increase or decrease in demand too.
- Universal: Amazon CloudFront web services make use of the international edge location networks that are located in every region.
Setting up the AWS CloudFront:
I hope you are now clear with the basics of AWS CloudFront, Now let’s check out how can you set up the AWS CloudFront for your use. Here are the steps below.
- Make sure you have an account for the AWS management console. You can also sign to the AWS management console with the help of https://console.aws.amazon.com/
- Once you log in, upload the Amazon S3 and make the permission to the public.
- Once the permission is set, you are now going to create a web distribution in the Amazon CloudFront using the below steps.
- Make use of the https://console.aws.amazon.com/cloudfront/ to open the CloudFront console.
- You will find the select a delivery method for your content page when you open the CloudFront console. Click on the Get started button from the web section there.
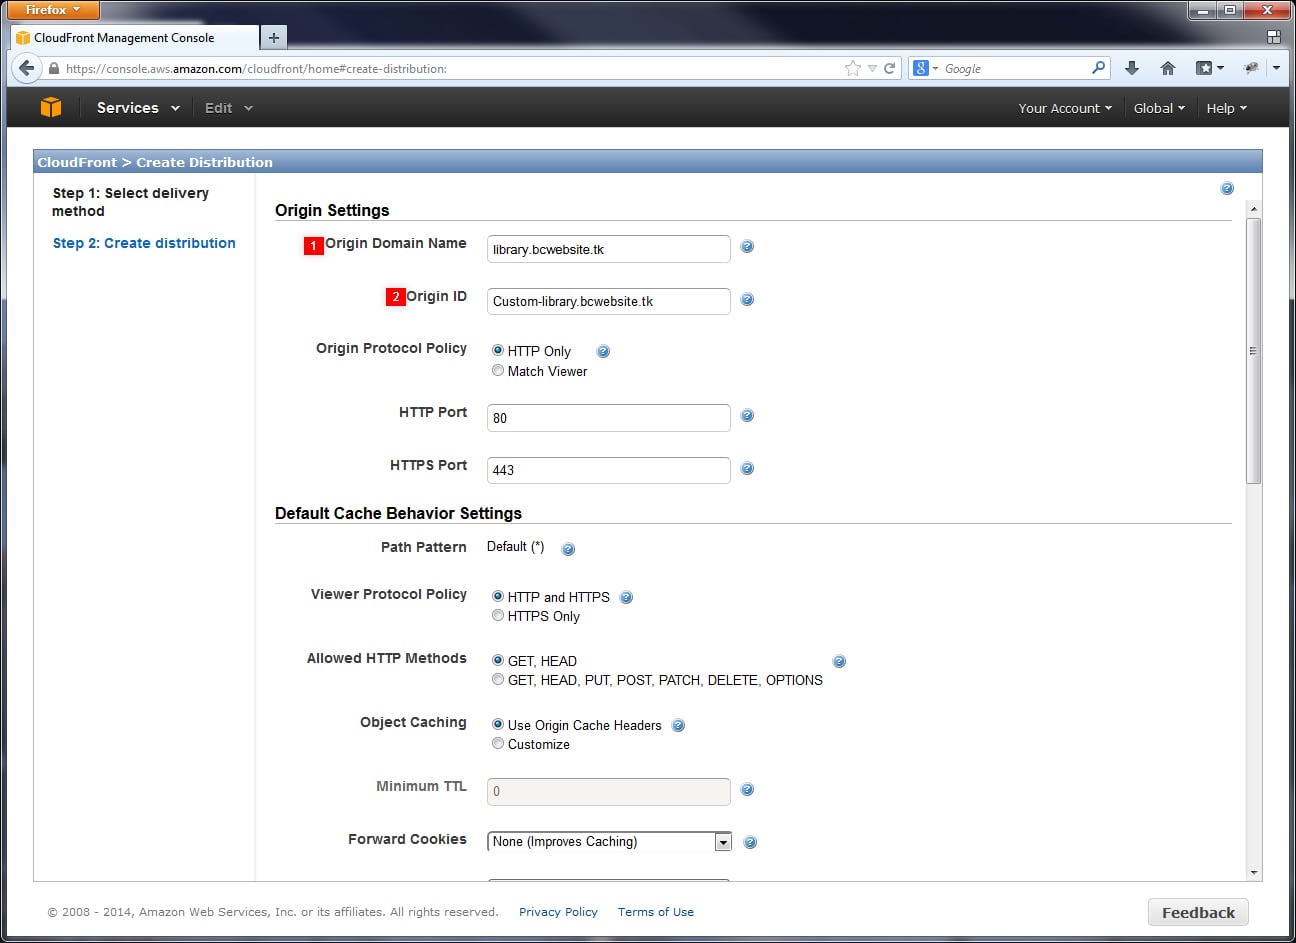
- You will get a create distribution page now. There will be an Amazon S3 bucket already created, click on it from the Origin Domain Name. You can leave other things like Original Path, Original ID, Restrict Bucket Access to their default.
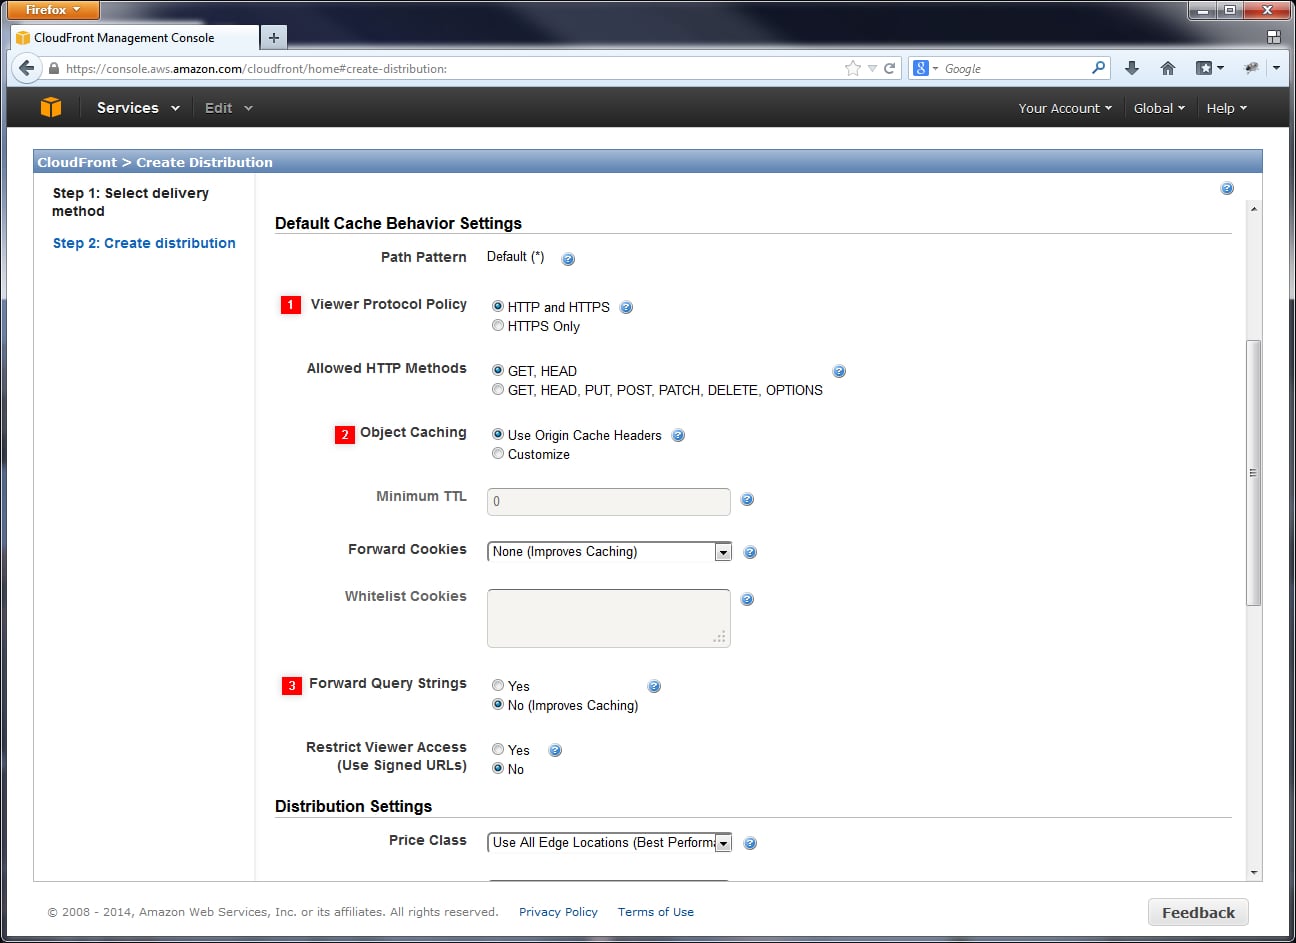
- Once you do this, you will get a default cache behavior settings. You make sure you don’t make any changes to it and keep everything as default, now click on the next page.
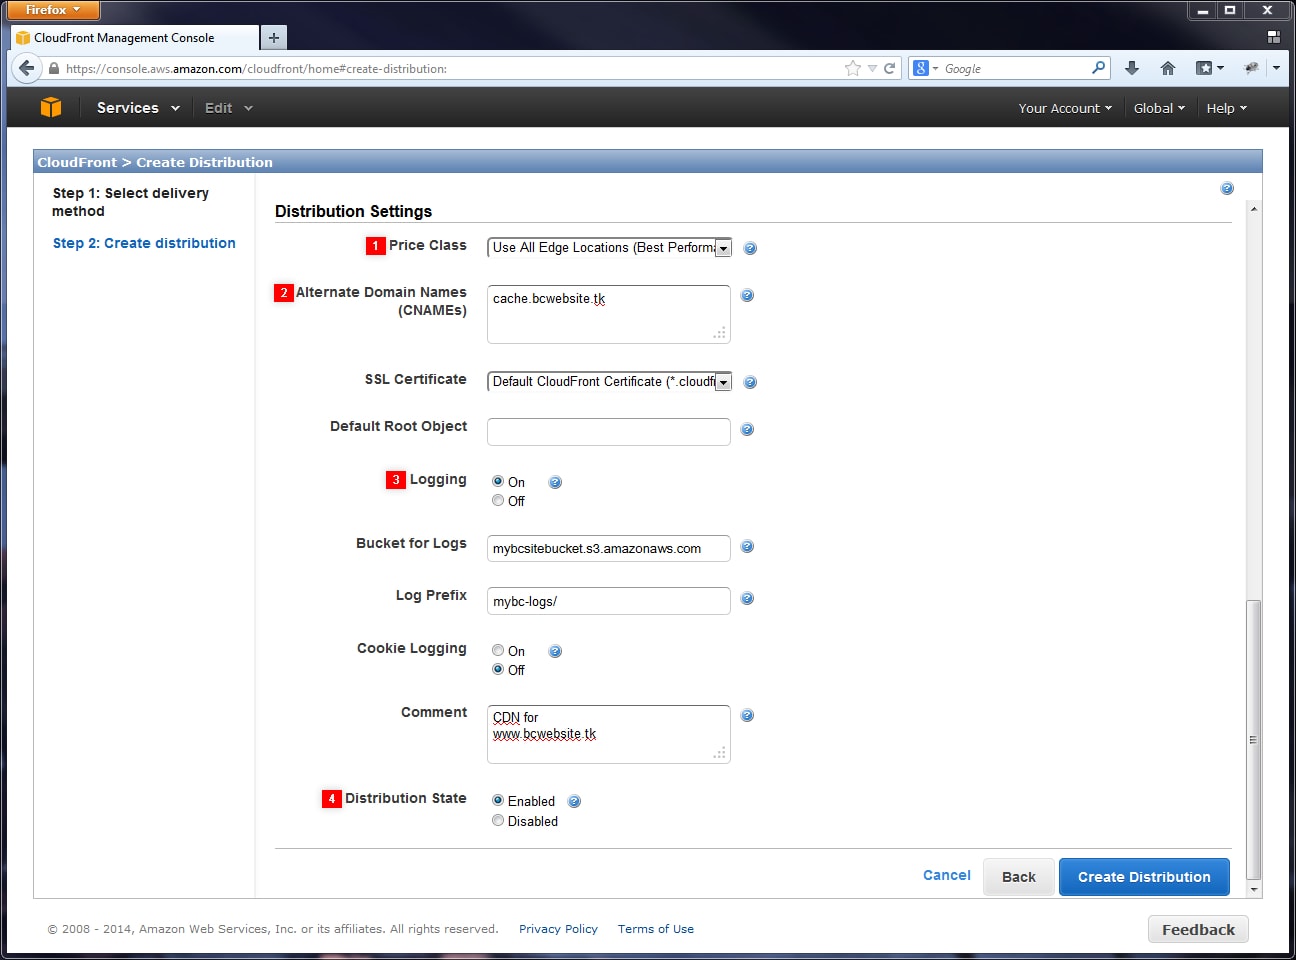
- You will find a distribution settings page. You can fill your details as per the needs and click on the Create Distribution button.
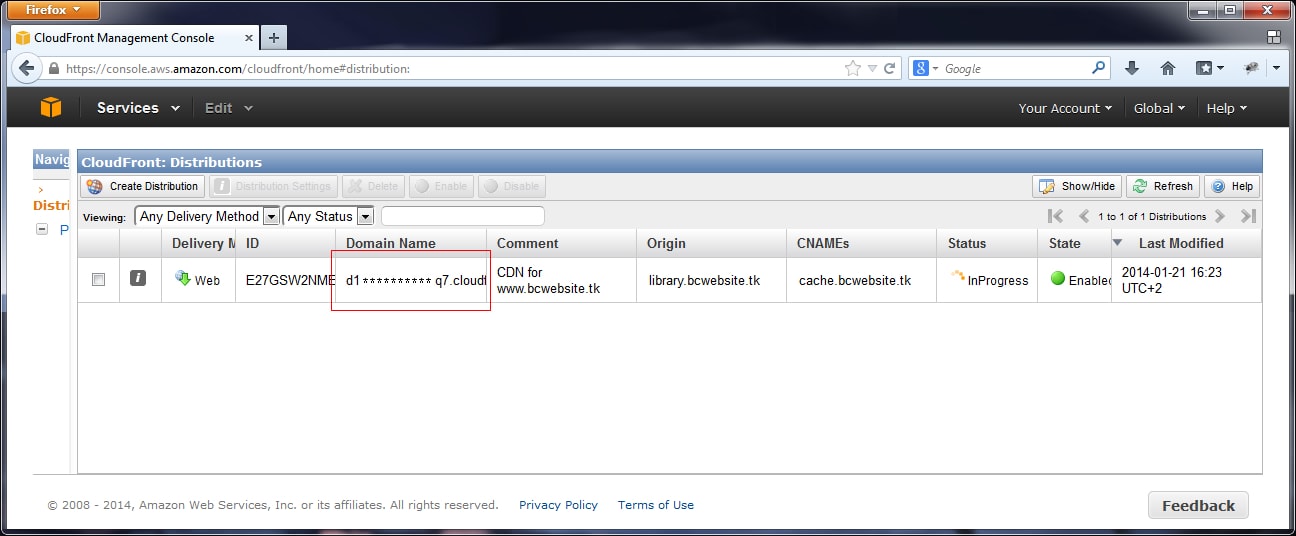
- You will see ‘In progress’ in the status column is changed to ‘Deployed.’ Click on the enable option to enable your distribution. The domain name will be available after 15 minutes on the distribution list.
Testing the link:
Once you create the distribution, now the CloudFront knows the Amazon S3 server’s exact location. The user will know their domain name that is integrated with the distribution. Apart from this, it’s easy to create a link to the bucket content of Amazon S3 that the CloudFront and domain name serves it. It means more time is saved. Here are the steps to link an object.
- Copy the below HTML code another new file and replace the domain name with the domain name that the CloudFront has provided to the distribution. In the place of the object name, you need to write the Amazon S3 file name.
<html>
<head>CloudFront Testing link</head>
<body>
<p>My Cloudfront.</p>
<p><img src = "http://domain-name/object-name" alt = "test image"/>
</body>
</html>
- You can save this in a .html extension.
- Now you can test the link by opening the web page in a browser and check whether the connection is working or not. If the link is not working, you need to crosscheck for the problems in the settings.
Step 1:
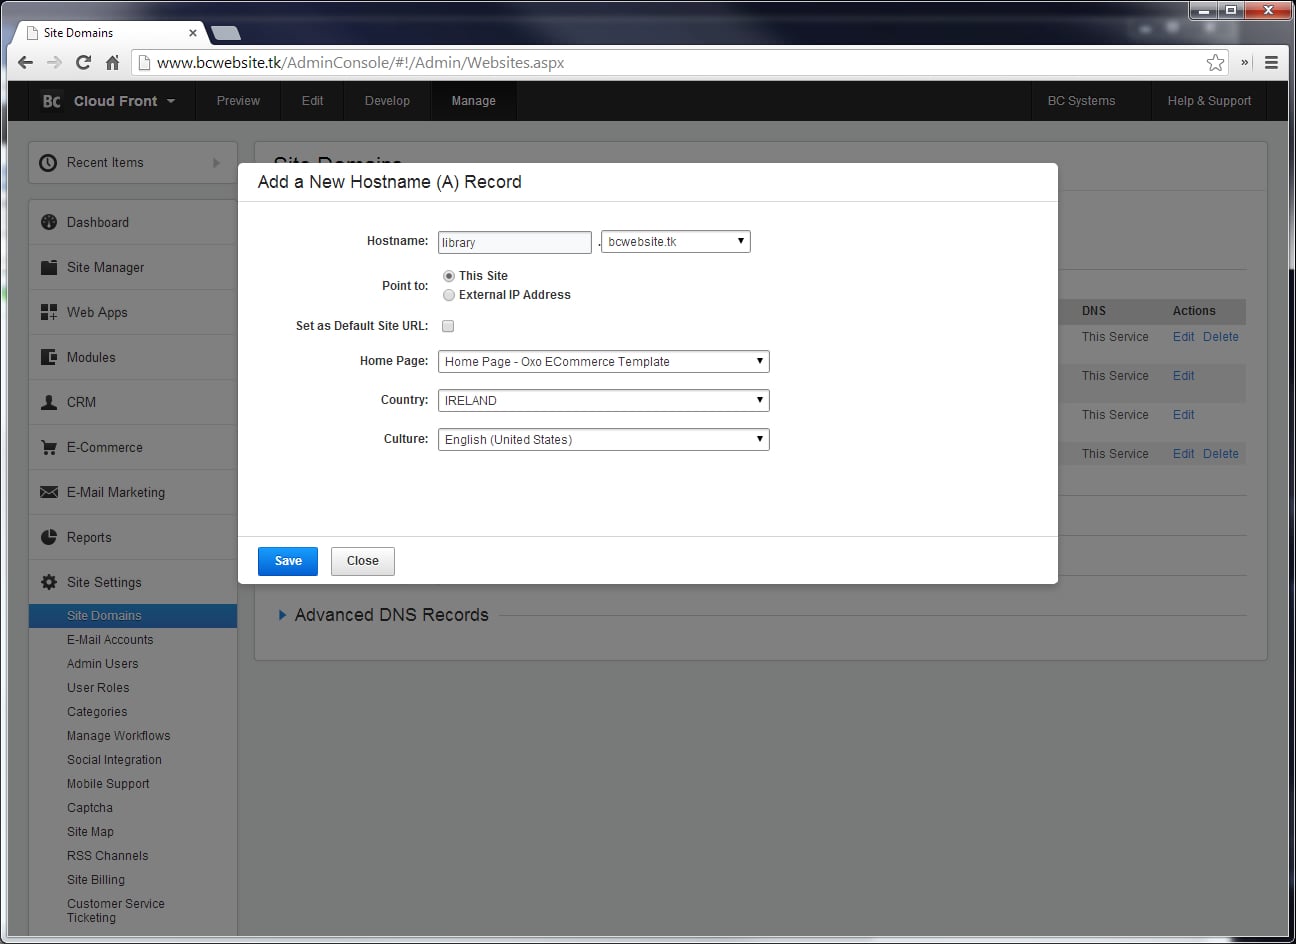
Step 2: Create a new Distribution on CloudFront
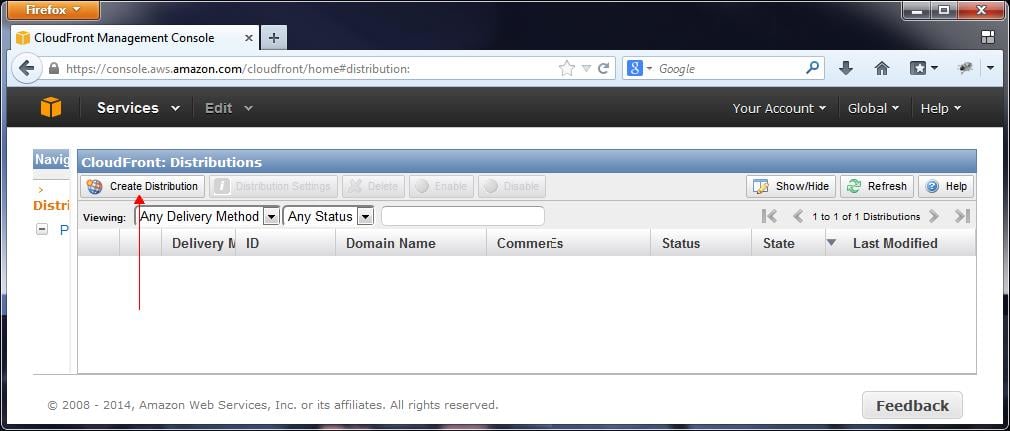
Step 3: Origin Settings
Step 4 :
Step 5 :
